Assuming you would like a blog post discussing how to paint woodland camo: One of the most difficult aspects of painting a vehicle is getting the camouflage to look natural and not like a bunch …
Written by: Jayden Martin
Published on:
Assuming you would like a blog post discussing how to paint woodland camo: One of the most difficult aspects of painting a vehicle is getting the camouflage to look natural and not like a bunch of random blobs. If you’re painting a vehicle that will be used in a woodland environment, then you’ll want to use a woodland camo scheme.
In this article, we’ll give you a step-by-step guide on how to paint a woodland camo pattern.
Choose a good location to paint your woodland camo
Make sure that the location is not too windy, and that there is plenty of space to work
Set up your painting area
You will need a table or other flat surface to work on, and something to cover the surface with
A drop cloth or old sheet will work well
Choose your paint colors
You will need at least two shades of green, brown, and black
Begin painting your base layer
This should be a light color, such as a light green or tan
Add your second layer
This should be a darker color, such as a dark green or brown
Add details
Use a small brush to add branches, leaves, and other details
Make sure to vary the colors, so that it looks natural
Allow the paint to dry completely
Once it is dry, you can add a clear sealer to protect the paint
How to paint camo with a brush
When it comes to painting your own camo pattern, there are a few different ways that you can go about it. One popular method is to use a brush to apply the paint. This can be a bit of a challenge, but with a little practice, you should be able to get the hang of it.
One thing to keep in mind is that you will need to use a different color for each different section of the camo pattern. This means that you will need to have several different colors of paint on hand. You may also want to consider using a stencil to help you apply the paint in a more precise manner.
Once you have all of your materials ready, you will need to decide on a method for painting the camo pattern. One way is to start from the outside and work your way in. Another option is to start in the middle and work your way out.
Whichever method you choose, just be sure to take your time and be careful not to smudge the paint. Once you have finished painting your camo pattern, you will need to let it dry completely before moving on to the next step. This can take a few hours, so be patient.
Once it is dry, you can then add a layer of clear coat to protect the paint job. Now that you know how to paint camo with a brush, you can get started on your own project.
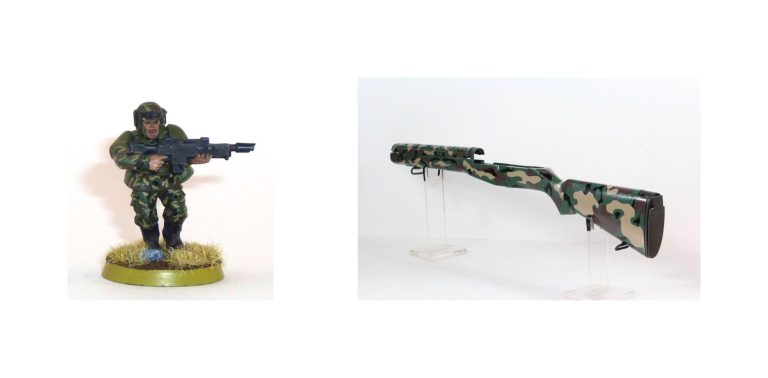
How do you paint Woodland Camo miniatures?
To paint woodland camo miniatures, you will need the following supplies:
Paper towel First, set up your workstation by covering your work surface with newspaper.
Then, pour a small amount of each color of paint onto the paper plate. Next, pick up your miniature and start by painting the entire figure green. Once the green paint is dry, start adding brown and black paint to create a camouflage effect.
To do this, start with large patches of brown and black and then fill in the smaller spaces with the other colors. Finally, once you are happy with the way your miniature looks, set it aside to dry. Now that you know how to paint woodland camo miniatures, get creative and have fun!
How do you paint forest camo?
There are a few different ways that you can paint forest camo, but the most common and effective method is to use a three-color scheme. The first color is dark green, the second color is light green, and the third color is brown. You will want to start by painting the entire surface dark green.
Once the dark green is dry, you can then start to add in the light green. Work in small sections and add the light green in a mottled pattern. Finally, add in the brown to add depth and create a more realistic forest camo appearance.
How do you paint a truck camo?
Assuming you would like tips on how to paint a truck in camouflage: One way to achieve a camo paint job is by using a stencil. After the truck is primed and painted a base color, the stencil is applied to the truck, and the paint is sprayed over top.
The stencil is then removed, revealing the camo pattern. Another method is to freehand the camo pattern. This can be done by taping off the section where the camo will be and then painting the desired pattern with a brush or airbrush.
A third option is to vinyl wrap the truck in camouflage. This is a less permanent solution, but it can give the truck a completely different look.
How do you make camouflage paint?
Assuming you would like a recipe for homemade camouflage paint: The ingredients:
1 part black latex paint
1 part dark green latex paint
1 part brown latex paint
1 part tan latex paint
1 part white latex paint
1 part light green latex paint
Instructions:
Begin by mixing the black, dark green, and brown paint together.
Add in the tan paint, and mix until desired shade is achieved.
To lighten the shade, mix in the white paint.
To green the shade, mix in the light green paint.
Enjoy your new custom shade of camouflage paint.
Conclusion
Assuming you would like a summary of a blog post discussing how to paint woodland camouflage: One method of creating woodland camouflage is to start with a dark green or brown basecoat. Once the basecoat is dry, use a lighter green or brown to create a mottled effect by randomly applying dots or patches of color.
Allow the lighter color to dry completely before adding a third, even lighter color. To finish, add highlights and shadows to create depth and dimension.
Jayden Martin is a talented individual who excels in multiple creative domains. As a color expert, painter, and DIY hobbyist, Jayden possesses a deep understanding of color theory and its application in various artistic endeavors.
With a keen eye for aesthetics and a knack for DIY projects, Jayden constantly explores new techniques and mediums, pushing the boundaries of their artistic abilities.